test-loop

How Weather Impacts Roofing Lifespan

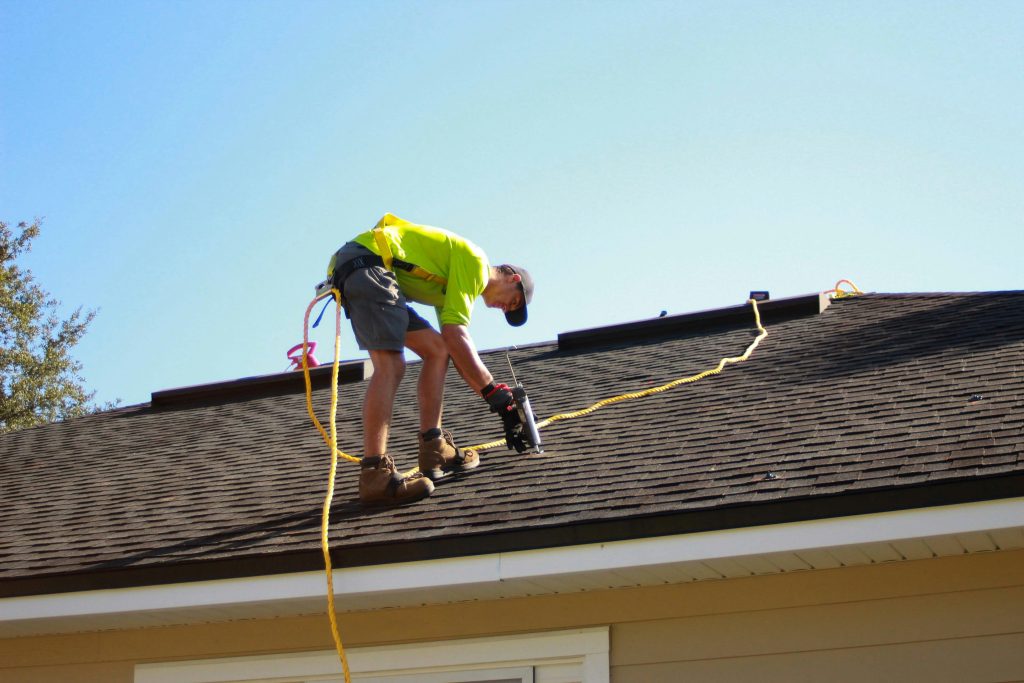
Your roof is the unsung hero of your home, tirelessly shielding you from the forces of nature. Yet, over time, weather can become the silent destroyer of even the most well-built roofing systems. Whether it’s the relentless summer sun, pounding rain, or harsh winter snow, weather conditions significantly affect roofing materials and their long-term durability. That’s why having a comprehensive roofing guide to understand how these forces interact with your roof is crucial to ensuring a long-lasting, weather-resilient structure.

Why Understanding Weather Effects is Crucial for Roof Longevity

Roofs are your home’s first and most critical line of defense against nature’s elements. Recognizing how different weather conditions impact roofing performance can help homeowners make smarter decisions about maintenance schedules, material selection, and when to opt for repairs or full replacements.

Neglecting weather-related roof issues often leads to water infiltration, structural damage, mold growth, and ultimately, the premature failure of the roofing system. Homeowners who understand these threats can act early—saving money and avoiding major headaches down the line.

Common Weather Conditions, Roofing Guide

Let’s break down the most common weather conditions that influence roofing lifespan, and how they silently wear down your protective barrier over time:

1. Sun and UV Exposure

Sunlight, especially in hot and sunny regions, is one of the most consistent stressors on roofing materials. Prolonged exposure to ultraviolet (UV) rays causes shingles and other materials to dry out, crack, warp, and fade. This degradation happens slowly but relentlessly, reducing the effectiveness of your roof over time.

Hot climates further amplify this issue due to constant thermal expansion and contraction. As roofing materials heat up during the day and cool at night, this back-and-forth movement weakens their structural integrity—particularly in asphalt shingles.

Tip: Reflective or light-colored roofing materials, like cool roofing or metal roofing, can help deflect sunlight and reduce heat absorption.

2. Heavy Rain and Moisture

Water is one of the most damaging elements to any home, and your roof is the first barrier against it. Continuous or heavy rainfall can wear down flashing, damage shingles, and lead to small leaks that eventually develop into major issues. Trapped moisture inside the roof layers can lead to rot, mold growth, and deterioration of the wooden structures beneath.

Roofs that are poorly drained or have flat slopes are particularly vulnerable. Water pooling accelerates deterioration, compromises waterproofing, and shortens the lifespan of your roof.

Tip: Ensure proper slope and drainage for your roof. Keep gutters and downspouts clear of debris to allow efficient water flow.

3. Snow and Ice Buildup

Snow might look peaceful on rooftops, but it can be incredibly destructive. The biggest threat in winter is the freeze-thaw cycle, which occurs when melting snow seeps into cracks and then refreezes. This expansion causes cracks to widen over time, allowing more water in with each cycle.

Ice dams are another major issue. These occur when snow melts on the warmer sections of the roof and refreezes near the edges. The resulting ice buildup traps more water, which then seeps under shingles and causes leaks.

Tip: Install proper attic ventilation and insulation to regulate roof temperature and reduce the formation of ice dams.

4. High Winds and Storms

Wind doesn’t just blow—it tears, lifts, and flings. Strong winds from storms or hurricanes can rip shingles right off, exposing the underlayment or decking. Even if shingles remain attached, wind-driven debris can cause punctures and abrasions, which can go unnoticed until serious leaks occur.

Tip: Secure roofing materials with storm-rated fasteners. After a storm, always inspect your roof or call a professional to check for hidden damage.

5. Hail Damage

Hailstorms can cause extensive damage to roofing surfaces, even if the hailstones are small. Asphalt shingles may lose granules, develop cracks, or experience punctures. Metal roofs may dent, while clay tiles may crack or break.

Tip: Choose Class 4 impact-resistant shingles or materials if you live in a hail-prone region. These are tested to withstand higher impacts and can extend the roof’s life.

How Different Roofing Materials React to Weather

Different roofing materials react differently to weather, making it crucial to match your roof type with your local climate:

  • Asphalt Shingles: Affordable and popular, but vulnerable to extreme temperature swings. Lifespan: 15–30 years.
  • Metal Roofing: Highly resistant to snow and heat, but can dent from hail.
  • Clay/Concrete Tile: Excellent for hot climates and UV resistance but may crack in freezing temperatures.
  • Wood Shakes: Natural and attractive but require regular maintenance in humid or rainy regions.
  • Slate: Extremely durable and weather-resistant but heavy and expensive.

Tip: Always consult with a local roofer about the best materials for your climate zone.

Seasonal Impact on Roofing Lifespan

Summer: Heat and Expansion

In summer, heat causes roofing materials to expand. At night, cooling temperatures cause them to contract. This repetitive cycle causes gradual wear, especially in lower-quality roofs. The adhesives holding shingles in place may soften in extreme heat, making them more susceptible to wind damage.

Tip: Check for signs of blistering or cracking after hot months, especially if your roof is older.

Winter: Freeze-Thaw Damage

Winter’s constant freeze-thaw cycles can wreak havoc on your roof. Water gets into small cracks, freezes, expands, and makes those cracks worse. Over time, this leads to bigger problems like leaks and mold. Ice buildup can even lift shingles, opening the door for more water damage.

Tip: Keep your attic well-insulated and ventilated. This not only reduces ice dams but also helps your home retain heat more efficiently.

Preventative Measures to Protect Your Roof

Preventing damage is far more affordable and effective than fixing it after the fact. Here’s how to stay ahead:

Routine Inspections

  • Inspect your roof twice a year (spring and fall).
  • Check after severe storms for missing or loose shingles.
  • Look for water stains or mold in the attic.

Regular Maintenance

  • Clean gutters and downspouts to prevent water backup.
  • Replace damaged flashing and caulk around roof penetrations.
  • Trim tree branches that hang over your roof.

When to Repair vs. Replace a Weather-Damaged Roof

Signs You Need Immediate Repair or Replacement

  • Persistent leaks, despite patching.
  • Shingles curling, cracking, or missing in large sections.
  • Sagging roof deck or visible structural weakening.
  • Mold or mildew spreading in your attic or on ceiling walls.
  • Granule loss exposing the bare fiberglass mat on shingles.

If over 25-30% of your roof is damaged or it’s more than 20 years old, replacing it may be more cost-effective in the long run than constant patchwork.

Long-Term Cost Considerations

It’s tempting to delay roofing repairs or choose the cheapest solution. But doing so can lead to recurring costs and reduced energy efficiency. Investing in weather-resistant materials with strong warranties can double the lifespan of your roof and save on heating/cooling bills.

Energy Star-rated roofing, for instance, reflects more sunlight and keeps your home cooler, reducing AC use in hot months.

Conclusion: Maximizing Your Roof’s Life in Any Climate

“Your roof may not always be in your line of sight, but it’s one of the most critical components safeguarding your home. Weather is a constant and often harsh factor, but with strategic maintenance, you can keep it from ruining your investment.”

Key Takeaways:

✅ Inspect your roof at least twice a year and after major storms.
✅ Choose roofing materials suited for your region’s climate.
✅ Address small problems early to avoid costly damage.
✅ Keep your attic well-ventilated and properly insulated.
✅ Invest in durable, energy-efficient materials with solid warranties.

By understanding how weather affects roofing and taking proactive steps, you can dramatically extend your roof’s lifespan and protect your home for decades.

How to Repair Vinyl Siding Without Replacing It – A Practical Vinyl Service Guide

Vinyl siding is a popular and durable choice for many homeowners due to its low maintenance, cost-effectiveness, and aesthetic appeal. However, over time, it can suffer from wear and tear caused by weather, accidents, or general aging. Fortunately, repairing vinyl siding is often a viable alternative to costly replacement. This Vinyl Service Guide will walk you through common issues, essential tools, a step-by-step repair process, and tips to maintain your vinyl siding in good condition.

Why Repairing is Better Than Replacing

Repairing vinyl siding is often the more cost-effective option compared to a full replacement. It’s not only budget-friendly but also environmentally friendly, as it reduces waste and the need for new materials. Replacing an entire section of vinyl siding may also require more time and effort, especially if the siding is customized or difficult to find. By addressing small issues as they arise, you can extend the life of your siding and avoid unnecessary expenditures. It’s a good idea to keep a print or word document of your maintenance history to track repairs and improvements over time.

Vinyl Flooring Services

Vinyl flooring services offer durable, stylish, and cost-effective solutions for residential and commercial spaces. These services include installation, repair, and maintenance, ensuring your floors remain in excellent condition while enhancing the overall look and functionality of your interiors.

Vinyl Service Guide, Siding

Like any exterior material, vinyl siding can face several challenges due to exposure to the elements. These issues can range from minor cosmetic flaws to structural problems. Identifying and repairing these issues promptly can prevent further damage.

Cracks and Holes

Cracks and holes are common problems in vinyl siding, often caused by impacts, such as debris or weather-related events. Small cracks may not immediately affect the structure of your home but can allow water and moisture to seep underneath, leading to mold, rot, and other problems.

Warping and Bending

Vinyl siding can warp or bend when exposed to extreme heat, direct sunlight, or poor installation. The plastic material expands and contracts with temperature changes, causing the siding to deform. Over time, this distortion can affect the appearance of your home and potentially damage the siding further.

Fading and Discoloration

Fading and discoloration are common problems with vinyl siding exposed to prolonged sunlight. Ultraviolet (UV) rays cause the color to fade, leaving the siding looking worn and uneven. While this is primarily a cosmetic issue, excessive fading can reduce your home’s curb appeal.

Tools You’ll Need for Repairing Vinyl Siding

Repairing vinyl siding requires a few essential tools that can help you address minor issues and larger repairs. These tools are relatively easy to use and widely available at hardware stores.

Basic Tools for Small Repairs

For small cracks, holes, or cosmetic issues, you’ll need the following basic tools: Utility knife

  • Vinyl patching compound or adhesive
  • Caulking gun and sealant
  • Paint (if needed for touch-ups)
  • Putty knife or scraper
  • Sandpaper (for smoothing surfaces)
  • These tools are essential for performing quick fixes on minor damage, such as patching cracks or sealing seams.

Tools for Replacing Larger Sections

For larger sections of damaged vinyl siding, you may need more specialized tools, including:

Siding removal tool (or zip tool) for loosening interlocking seams

  • A hacksaw or tin snips for cutting new panels to size

  • A hammer or screwdriver for securing the new panels

  • Tape measure for accurate panel measurement

These tools will help you safely and effectively remove and replace sections of vinyl siding that have been severely damaged.

Step-by-Step Guide to Repairing Vinyl Service

Here is a detailed, step-by-step guide on how to repair vinyl siding without replacing it entirely.

Step 1: Inspect the Damage

Before starting any repair work, it’s important to thoroughly inspect the damaged area. Check for cracks, holes, bends, or signs of water damage. Assess the severity of the damage and determine if a simple repair is sufficient or if partial replacement is necessary. Take note of the color and texture of the existing siding, as you may need to match it during repairs.

Step 2: Removing the Damaged Section

If you need to remove a damaged panel, start by loosening the interlocking seams. Use a siding removal tool (or zip tool) to detach the panel from the others. Work carefully to avoid damaging the neighboring panels. If the damaged section is difficult to remove, gently use a hammer or pry bar to loosen it without causing further damage to the surrounding siding.

Step 3: Repairing Small Cracks and Holes

For small cracks or holes, you can use vinyl patching compound or adhesive. First, clean the damaged area to ensure the compound adheres properly. Apply the compound using a putty knife, smoothing it evenly over the crack or hole. Allow the compound to dry completely. Once dry, sand the area gently to create a smooth surface that blends seamlessly with the rest of the siding. You may need to apply additional coats of compound for larger cracks.

Step 4: Replacing a Damaged Panel

If a section of siding is beyond repair, you may need to replace it. Measure the length of the damaged panel and purchase a new one that matches your current siding. To install the new panel, slide it into the interlocking seams and secure it with nails or screws. Make sure it’s level and flush with the adjacent panels. Be careful not to overtighten the nails, as vinyl siding needs to expand and contract with temperature changes. It’s also a good idea to record the repair for future reference and keep track of all maintenance services performed on your siding.

Step 5: Sealing the Seams and Gaps

Once the repair is complete, seal any gaps or seams to prevent water infiltration. Use high-quality caulk or sealant to fill in any spaces between the siding and trim. This step is crucial for ensuring that water doesn’t get trapped behind the siding, leading to mold and mildew growth.

Tips for Maintaining Vinyl Siding

Proper maintenance can help extend the life of your vinyl siding and prevent future repairs. Here are a few tips for keeping your siding in top shape:

Regular Cleaning and Maintenance

Regularly clean your vinyl siding to remove dirt, debris, and algae buildup. Use a pressure washer or a simple hose with a cleaning solution to gently scrub the surface. Be cautious not to use excessive pressure, as this can cause damage to the siding.

Preventing Future Damage

To prevent future damage to your vinyl siding, inspect it periodically for signs of wear. Look for cracks, loose seams, or warping, and address any issues promptly. Regular vinyl service from experienced professionals can help identify potential problems early, ensuring your siding remains in good condition. Ensure that gutters and downspouts are clear to prevent water from pooling around the foundation, which can lead to water damage. Finally, if your home is in an area with extreme weather conditions, consider installing protective coverings or shields to reduce the risk of impact damage—a cost-effective solution to extend the life of your siding.

Everything You Need to Know About Glass Repairs

Glass is an elegant yet fragile material that’s widely used in homes, offices, and vehicles. From windows and doors to mirrors and decorative panels, glass plays a vital role in providing natural light, aesthetic appeal, and visibility. However, due to its delicate nature, glass is prone to damage—whether from accidents, weather, temperature fluctuations, or wear over time. This comprehensive glass repair guide will help you understand how to maintain, repair, and protect your glass surfaces for long-lasting safety and performance.

Whether it’s a small crack in your window or a shattered door panel, glass repairs are essential to maintain safety, energy efficiency, and aesthetics. This guide covers everything you need to know about glass repairs—from types and methods to costs, tools, and prevention tips.

Types of Glass and Their Repair Methods

Different types of glass require different repair approaches depending on the severity of the damage and where the glass is located. The type of glass involved—single-pane, double-pane, tempered, laminated, or decorative—also influences how repairs are conducted.

Window Glass Repair Guide

Window glass and mirror surfaces are some of the most common areas where damage occurs. Cracks, chips, or full breakage can result from weather conditions (hail, wind), impact (balls, debris), or simply wear and tear over time.

  • Minor Damage: Small chips or cracks in single-pane windows can often be repaired using resin injection techniques. This process involves cleaning the damaged area and injecting a transparent resin that hardens and prevents the crack from spreading.
  • Structural Damage: If the structural integrity is compromised—especially in large cracks or spiderweb-like damage—a full replacement may be necessary.
  • Double or Triple Glazing: These types of windows are more complex. Double- or triple-glazed units consist of two or more glass panes with insulating gas between them. Repairs to these require technical expertise and often involve replacing the entire glass unit to maintain insulation.

Door Glass Repairs

Door glass, especially in sliding patio doors or glass-paneled front doors, is highly susceptible to damage due to its location and usage. Accidental hits, sudden temperature changes, and even forced entry attempts can lead to cracking or shattering.

  • Cracks: If only a crack is present and it hasn’t compromised the entire surface, a strong adhesive resin might seal it effectively.
  • Shattered Glass: In cases of complete breakage—especially with tempered or safety glass—replacement is the only viable option. These types of glass are designed to break into small, blunt pieces for safety, making repair impossible.
  • Custom Panels: Decorative or frosted door panels may require custom replacements, increasing cost and turnaround time.

DIY vs. Professional Glass Repair

Knowing when to fix glass yourself versus calling a professional can save you time and money while also ensuring your safety and the longevity of the repair.

When You Can Fix It Yourself

Minor chips, small cracks, or surface scratches can often be handled at home using a basic glass repair kit. These kits generally include:

  • Transparent resin
  • Curing film
  • Scraper or razor blade
  • Instruction manual

DIY repair is suitable for:

  • Single-pane windows
  • Mirror glass
  • Tabletops or furniture glass

However, if you’re dealing with:

  • Double-glazed or triple-glazed windows
  • Tempered or laminated safety glass
  • Glass used in structural applications (e.g., storefronts, balustrades)

…it’s best to call a certified glass technician. Attempting to fix these yourself can lead to injury, inadequate sealing, or further damage.

Tools and Materials Used in Glass Repairs

Before you start any glass repair project, having the right tools and materials is essential for safety, accuracy, and success.

Essential Tools for Glass Work

  • Safety gloves and goggles: To protect against cuts and glass splinters
  • Glass suction cups: To safely handle large panes of glass
  • Utility knife or glass cutter: For trimming or cutting glass
  • Putty or glazing compound: To seal replacement glass into a frame
  • Measuring tape: For accurate sizing and fitting
  • Replacement glass (if needed): Pre-cut to match dimensions
  • Resin kits for crack filling: For DIY surface repairs
  • Caulking gun and sealant: To secure glass and prevent moisture intrusion

For larger repairs, you may also need:

  • Heat guns for softening old putty
  • Clamps for holding glass in place
  • Specialized framing tools for custom fittings

Always prioritize safety by wearing proper protective gear and working in a clean, controlled environment.

Cost Factors in Glass Repairs

The cost of glass repair can vary widely depending on the size, type, and location of the damage. While minor issues can be inexpensive, complex or custom jobs can cost significantly more.

Size and Type of Damage

  • Minor Chips: Can cost as little as $50 to $75 to repair, especially for single-pane glass.
  • Cracks and Holes: Repairs range from $75 to $200 depending on the glass type and crack size.
  • Glass Replacement: Replacing entire panels, especially double-glazed or decorative glass, can range from $150 to $500 or more.
  • Custom or Specialty Glass: Frosted, stained, or textured glass increases costs due to special materials and craftsmanship.

Other Cost Influencers

  • Type of Glass: Tempered, laminated, and insulated glass is more expensive to repair or replace than basic single-pane glass.
  • Accessibility: Glass on upper floors or hard-to-reach areas increases labor and equipment costs.
  • Urgency: Emergency services or after-hours repairs will often come with premium pricing.
  • Installation Requirements: If your glass is part of a door, window, or custom frame, extra labor for fitting and sealing can raise the cost.

Getting multiple professional quotes is the best way to estimate your total repair expense accurately.

Preventing Future Glass Damage

Preventative measures can go a long way in reducing the frequency and cost of glass repairs. Simple maintenance and smart installations can extend the life of your glass and keep repair costs down.

Regular Inspections and Maintenance Tips

  • Inspect Seals and Frames: Check regularly for wear and tear. Replace old weather stripping and seals to prevent drafts and moisture damage.
  • Clean Gently: Use microfiber cloths and glass-safe cleaners. Avoid abrasive pads that can scratch the surface.
  • Use Protective Films: UV-blocking or shatter-resistant films add a layer of protection, especially on exposed windows or doors.
  • Install Barriers: In areas of high activity, such as near driveways, playgrounds, or inside homes with pets and children, consider adding screens, railings, or furniture placement to reduce the risk of impact.
  • Address Cracks Early: Don’t ignore small cracks or chips. Over time, they can spread due to vibration, pressure, or changes in temperature, leading to costly full replacements.

Conclusion: Keeping Your Glass Surfaces in Top Shape

Glass and mirror repairs are a critical part of property maintenance that should not be overlooked. Whether you’re dealing with minor scratches or full-panel replacements, understanding the types of glass, having the right tools, and knowing when to call a professional makes the process manageable and safe.

Regular inspections, timely repairs, and preventive maintenance are your best strategies for ensuring long-lasting, safe, and beautiful glass and mirror surfaces in your home or business. Whether you choose to DIY or hire a pro, proper glass care will protect both your investment and your safety.

By staying informed and proactive, you can keep your windows, doors, and mirrors in pristine condition while avoiding unnecessary costs or hazards.